Hooks
Categories:
By Eric Wauters (waldo), Partner-Ready-Software
Abstract
As a partner, adding new code to NAV means interfering with code shipped by Microsoft. Minimize your footprint of changes in Microsoft code, so that, when a new NAV version is shipped, you avoid conflicts and upgrade impact. The core NAV code is the “danger zone” - the less you touch it, the happier your upgrade will be.
Description
When doing development over years, by different developers with different mindsets, the standard codebase gets changed a lot, adding multiple lines of code, adding local and global variants, adding or changing keys, changing existing business logic, … . In other terms, the standard text objects are being changed all over the place.. .
After years, it’s not clear why a change was done, and what was the place where the change was intended to be done. And the latter is quite important in an upgrade process, when code in the base product is being refactored: if the exact place of the posting of the Customer Entry is being redesigned to a separate number, the first thing I need to know, is that I did a certain change at the place: “where the posting of the Customer Entry starts”. The definition of that place, we call a “Hook”.
By minimizing the code in already existing application objects, you will make the upgrade process much easier, and all customization business logic will be grouped in new objects. When using atomic coding, it will be very readable what is being customized on a certain place in an existing part of the application.
To minimize the impact of customizations, the idea of hooks is:
- First of all, name the places in the already existing code where customization is needed;
- Second, place your business logic completely outside the already existing application code.
I recommend to use this concept on:
- All objects of the default applications that need to be changed
- On objects that should not hold any business logic (like tables, pages, XMLPorts)
Usage
Step 1 - if it doesn’t exist yet - you create your Hook Codeunit. As the name assumes .. this is always a codeunit. We apply the following rules to it:
- One Hook always hooks into one object. Which basically means that I will only declare this new codeunit in one other object (which is its parent object)
- The naming convention is: “The_Original_Object_Name Hook”. Naming conventions are important, just to find your mapped object, and also to be able to group the Hooks.
Step 2, you create the hook, which is basically a method (function) in your codeunit. The naming is important:
- The naming of the hook should NOT describe what it is going to do (So, examples like “CheckMandatoryFields”, “FillCustomFields” should not be used as a hook)
- The naming of the hook should describe WHERE the hook is placed, not what the hook will be doing (as nobody is able to look into the future .. :-))
- To help with the naming, it is a good convention to use the “On”-prefix for these triggers. This way, it’s very clear what are hooks, and what aren’t..
Step 3, it’s time to hook it to its corresponding object and right place in the business logic of that object. You do this by declaring your codeunit as a global in your object, and using the created hook function on its place in the business logic. This way, these one-liners apply:
- A Hook Codeunit is only used once in one object only (its corresponding object)
- A Hook (function) is used only once in that object. As a consequence, changing the parameters has no consequence: you only need to change one function-call
- The codeunit is declared as a global. That exact global is the only custom declaration in the existing object .. Everything else is pushed to the hook-codeunit.
Step 4, implement your business logic in the hook. Do this in the most atomic way, as there is a good chance that this same hook is going to be used for other business logic as well. Best is to use a one-line-function-call to business logic, so that the Hook Function itself stays readable.
Example
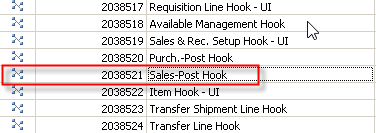
Suppose, we want to add business logic just before posting a sales document. In that case, we have to look for the most relevant place, which is somewhere in the “Sales-Post” codeunit. So:
Step 1: create codeunit “Sales-Post Hook”
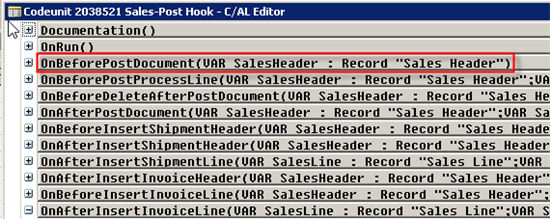
Step 2: create the hook function “OnBeforePostDocument”
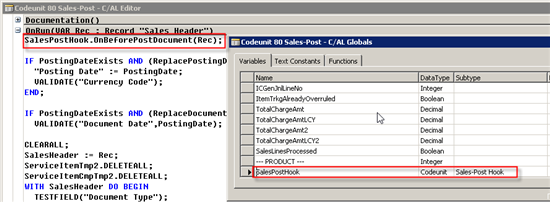
Step 3: declare a global in the “Sales-Post”-codeunit, called “SalesPostHook”. Then, call the Hook Function that you created in Step 2 in the right place.
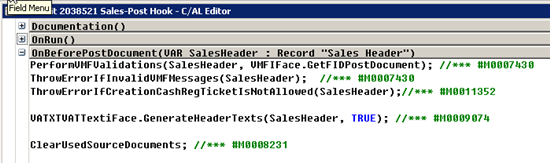
Step 4: implement the business logic, by calling out to a new function. And implement the test-codeunit.
Consequences
This pattern can be used in all cases to put business logic. But I see three possible approaches
- You only declare the most important and most used hooks
- This way, you limit the amount of objects and hooks to only a few in the default product
- For example, only the OnBeforePostSalesHeader, OnBeforeReleaseSalesDocument, .. And no field validation or such…
- Only at objects of the default application which you are customizing.
- This way, you don’t want to create hooks for your own objects, only default existing objects.
- (recommended) You create hooks on all places you don’t want to write business logic, and on all existing objects which you would like to customize.
- This is a very consistent way of working, as in any case, your business logic ends up in either a hook, or in its corresponding objects from a specific design pattern. But you know that the entry point is always a hook.
- You know what to expect in any case, both changed business logic in existing code and business logic in newly created code is entered from a hook.
Related Topics
Atomic coding: It’s important that the hook function is readable in the most extreme way. For this, we recommend to use the “Atomic Coding” concept.
See here a comparison / extension of hooks : http://www.waldo.be/2016/02/29/nav-2016-hooks-or-events/
Feedback
Was this page helpful?
Glad to hear it! Please tell us how we can improve.
Sorry to hear that. Please tell us how we can improve.