Instructions in the UI
Categories:
Originally by Nikola Kukrika at Microsoft Development Center Copenhagen
Abstract
To mitigate usability problems with learnability or discoverability of NAV functionality, it is possible to embed instructions in the UI in connection with the task that the user is performing. The goal is to explain how to use the product or feature without impairing the user’s productivity after user has learned how to use a feature.
Description
Users must often go through a few days of training to learn how to use NAV, and even then, many users rely on super users to help them mitigate difficulties using NAV. In addition, because of low discoverability and learnability, many useful features are not being used at all.
Users’ expectations are changing. They expect the software to be usable out-of-the-box because this is the trend in software generally.
One of the cheapest and most effective methods to solve usability issues is to embed instructional messages in the product. From a user-experience point of view, this should be used as a last resort. UI should be self-explanatory, efficient, and simple to use. Accordingly, you should only implement this pattern if simplifying and improving a scenario is not possible or is too expensive.
In this connection, the most important requirement is not to impair productivity of the users. One of the biggest and most common UX mistakes that developers make is to “optimize for new users”. After the user has learned how to use the product, all the instruction texts and dialogs that we added to the UI will clutter the page and make information less visible. Instructional dialogs on routine tasks will become annoying. Therefore, we must make all instructions dismissible.
In the Mini App solution we have used following elements:
- Dismissible dialogs
- FastTabs with instructional text
- Help tiles on a Role Center
- Tooltips on actions and fields
- Task-oriented page Help
Usage
The following pattern applies to dismissible parts in the UI.
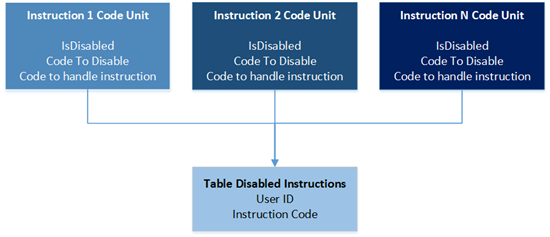
We have a table that stores the instructional code ID and the UserID, so that we can track which user has turned off which instruction. All the logic handling is done from a codeunit. It is the responsibility of the codeunit to show/hide dialogs if needed.
Dismissible Dialogs
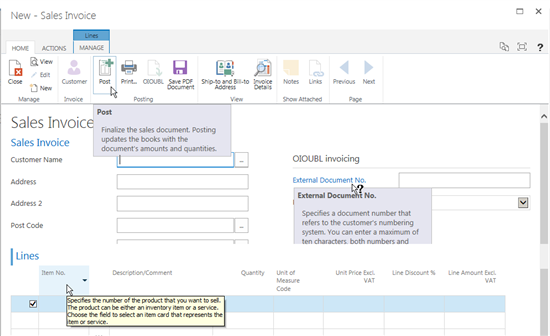
Dismissible dialogs show the instructional message about the functionality, with the user option to select “Don’t show this again”. This is a good solution to problems where users enter text in the wrong place, or to explain behavior of a somewhat hidden feature.
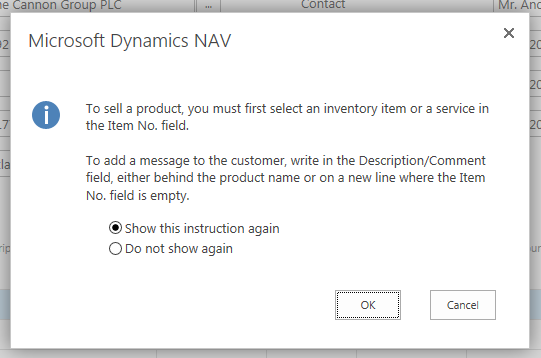
On a recent usability study of the Description field on sales or purchase lines, most users ignored the No. field and started entering text in the description field before proceeded to enter a quantity. In the solution in question, text only is treated as a line comment if the No. field is blank. The fix was to update the field name to Description/Comment and to provide a message that typing in the field creates a comment only. Users that often use comments can then choose “Do not show again” to get rid of the instructional text.
When to use: Recommendation is to use only when many users are entering data in the wrong way and modifying the code is costly. This is an interrupting dialog, but the benefits are that it is very hard to overlook this dialog.
FastTabs with Instructional Text
Instructional text on FastTabs is ideal for showing larger amounts of text in the UI.
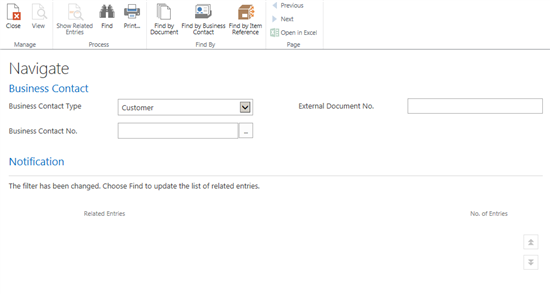
When a user changes a filter in the Navigate page, we blank the grid. This may confuse the users as to how to proceed. The Notification FastTab provides information on what has happened and gives instructions on how to proceed.
Similar implementation is to have the FastTab always visible with the Do not show again check box present, so that users can dismiss it after they have read the message. This is less intrusive than using a dialog, and it has the benefit of being always visible compared to the dialog. The drawback is that users may not read it or may not dismiss it.
Information Tiles on Role Centers
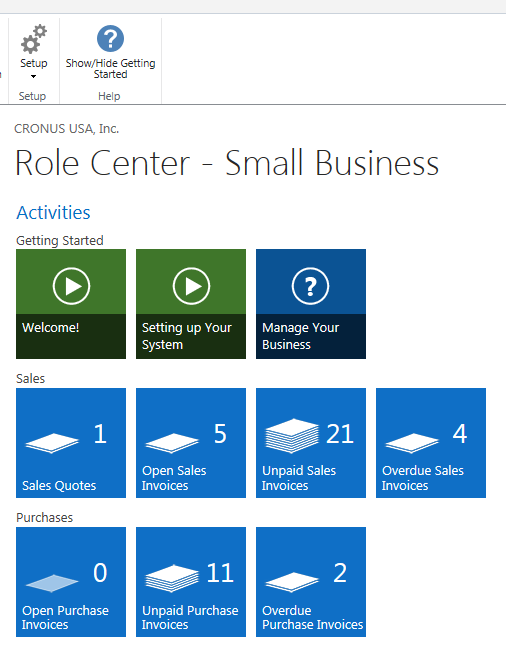
On the Small Business Role Center page (9022), we have implemented a Getting Started group containing action tiles. Clicking on the first two tiles will play instructional videos. Clicking on the third tile launches a dedicated help topic. Since these tiles will get in the way of the experienced users, an option to hide the entire group is provided.
Note: in NAV 2013 R2, actions appear as tiles in the web client only. In the win client, they appear as links. In the web client, the actions only appear if they are in a group for themselves (without Stack Queues – empty group with only actins defined).
To implement tiles for instructional videos
- Upload a video to a video hosting service (check if licensing is allowing you to use if for this usage. Examples of video hosting services are: YouTube, Vimeo, Yahoo Video.)
- Get the code to embed the video (select option embed).
- You can reuse the code on the Mini Video Player Page page (1395) or implement a custom one.
Important parts:
VideoPlayerAddIn.SetFrameAttribute function is used to set an attribute to the iframe that will be playing the video.
Example of the embed code:
<iframe width="560" height="315" src="//www.youtube.com/embed/7SGp9pA9cAY" frameborder="0" allowfullscreen\></iframe\>
You must assign src attribute to src of the embed code, for example:
VideoPlayer.SetFrameAttribute('src', 'https://www.youtube.com/embed/7SGp9pA9cAY');
Without this, the video will not play. You can use the same function to assign other attributes, for example to remove frame border use:
VideoPlayer.SetFrameAttribute(' frameborder', '0');
Height and width should be set by using the following functions, since they ensure that the video will be centered on the page.
VideoPlayerAddIn.SetHeight(Height) and VideoPlayerAddIn.SetWidth(Width);
If you would like to reuse the Mini Video Player Page page (1395), then use:
SetParameters(Height,Width,Src,Caption), which uses the functions described above.
4. As a last step you need to implement the action on the group and assign a video icon
Note:
Videos are implemented to be Web Client only. This is done because Flash player control that is used by most of the providers is not working well with WebBrowser control that the Windows Client is using.
For displaying the videos on the Windows client, the simplest option is to provide an action with a link that opens a video page in a browser or a page hosting all of the instructional videos you have provided. Optionally you can implement a .NET add-in control that would be able to play the video from selected provider.
To implement tiles for help topics
You only need to add an empty action with a TileHelp icon. Platform will render the action and will generate the logic to trigger a help call when user clicks on the icon. On the Help Server create an help topic that matches the URL.
Tooltips on actions and fields
Platform improvements in NAV 2013 R2 provide ability to create tooltips for actions and all kinds of fields in the web client simply by filling the TooltipML property on the page object.
Note: In NAV 2013 R2, tooltips (in the 1330-range pages only) are extracted from intro paragraphs in the related field topic and inserted build-time using an infrastructure system.
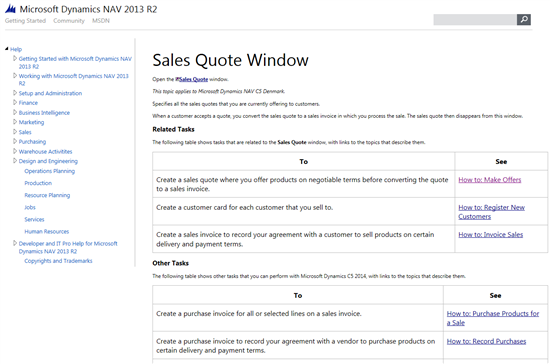
Task-oriented page Help
Every page in NAV 2013 R2 has a help icon in top right corner that should open a Task-oriented help topic that should be related to this page. We recommend providing help topics for new task pages that you provide with your solutions.
NAV Usages
Dismissible dialogs - Used in the Description field in pages 1305, 1325, 1355, 1373, ….
FastTabs with instructional text – Navigate page (344).
Help Tiles on Role Center – Small Business Role Center page (9022) and Mini Activities page (1310).
Tooltips – All pages in the 1300 number range.
Task-oriented page help – all task pages in 1300 number range
Ideas for Improvement
Provide the support for the invoking any Help topics (URL on the Help Server from C/AL code. Then we would be able to promote help actions anywhere or launch them from C/AL code if needed.
Implement tooltips across the application and in all country versions. (Requires a run-time infrastructure system.)
Feedback
Was this page helpful?
Glad to hear it! Please tell us how we can improve.
Sorry to hear that. Please tell us how we can improve.